Should a newbie start learning making layouts programmatically, just stick with storyboard, or maybe start with SwiftUI?
Dear padawan – eventually you would need to be proficient in all of them – for you may not know what battles you might find yourself in. These are just tools and – like all things in life – different challenges call for different solutions thus the tools needed to solve them.
You would need to know which situations that storyboards works best, when to make programmatic layouts, or even challenges that SwiftUI would solve with ease. Yet as a newbie, you would need to start somewhere then chart your way through this maze. Alas, the iOS SDK documents, being the reference that they are, does not provide a learning path for you to follow. Online tutorials rarely provide the bigger picture. Worse, forums and discussion groups often show conflicting opinions on these – which doesn’t help beginners to chart a course.
But you clicked here to navigate your way into becoming a professional iOS developer, didn’t you? You’ve come to the right place. By the time you’re done with this article, you’ll be able to confidently select whether to use storyboard, programmatic layout, or even SwiftUI for a given challenge. Read on as I’ll show you to the path of enlightenment.
What’s in the Box
Apple’s Software Development Kit (SDK) for building iOS apps has a rich heritage going back to 1997 from Steve Jobs’ second startup called NeXTSTEP. With it comes the maturity and experience of over 30 years of continuous improvements and refinements. You can look at Steve Jobs’ demo of Interface Builder back in 1997 and appreciate Xcode’s roots – how far things have improved, yet how much the essence remains the same.
In broad terms, developing iOS native user interfaces falls into two categories:
- Use a graphical designer. Literally “draw” the controls using Xcode’s Interface Builder akin to placing stickers on paper.
- Code-based. Write code to instantiate widgets and write more code so they would fall into the correct places.
Under those two categories there is a plethora of tools available. Most are current, one is legacy but still supported.

XIB
This is the first GUI designer for iOS which has served to develop macOS applications. XIB is short for XML Interface Builder, which in turn derived from NIB – NeXT Interface Builder, which came from Steve Jobs’ other computer company mentioned above. In fact, XIB files gets converted to NIB files when the application is built. These NIB files are placed inside the application bundle to be read by UIKit at runtime to instantiate and configure the various user interface objects.
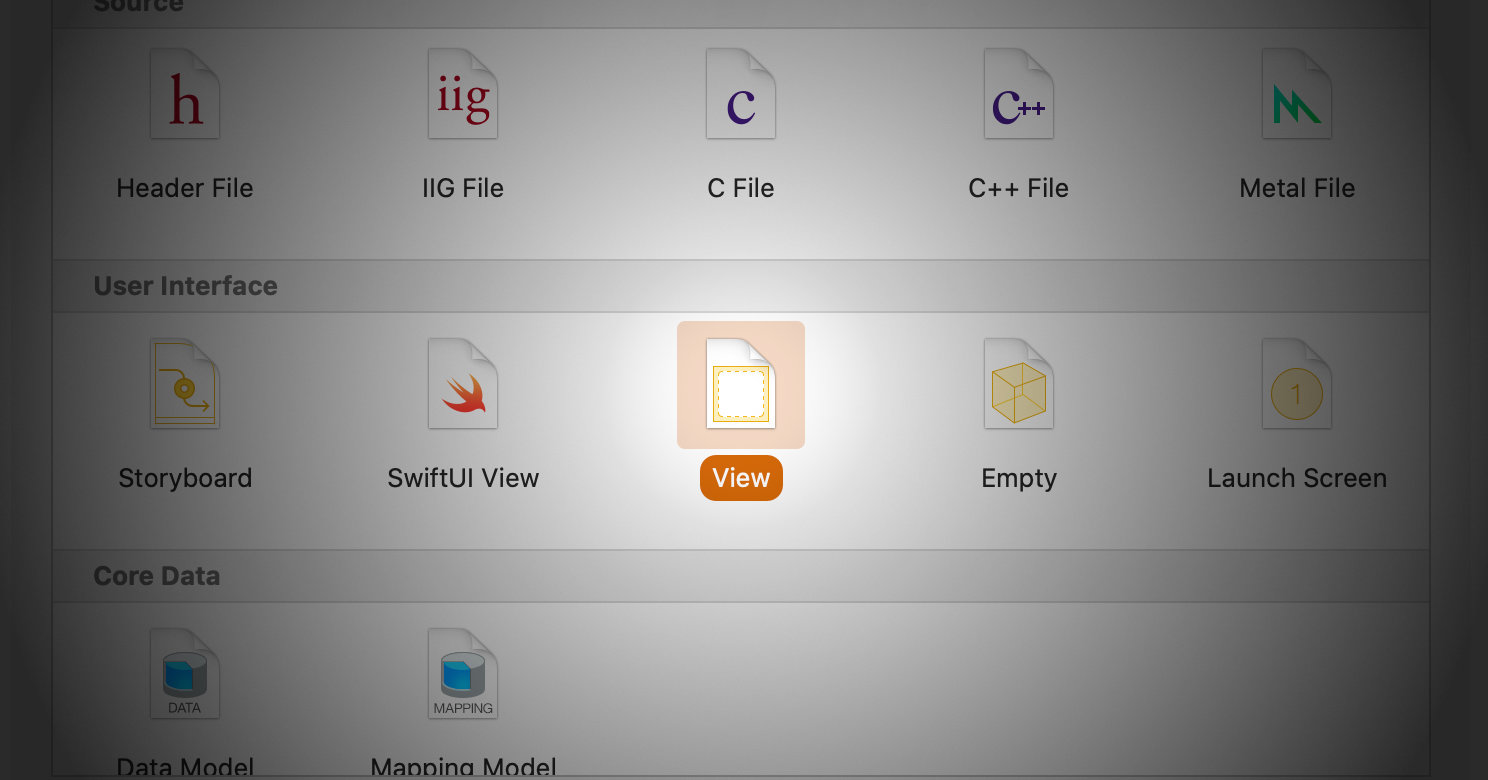
Nowadays XIB files have mostly been superseded by storyboards. However they are still useful for table view cells, collection view cells, or other similar user interface elements. More so since table and collection views provides specific support for XIB cells.
XIB files usually has a primary top-level object designated as the owner of the file. This would be a UIViewController subclass, and in some cases UITableViewCell or UICollectionViewCell. However, this is not a hard requirement. When instantiating objects from XIB files yourself, you can designate any (Objective-C compatible) object as the owner. Moreover, just about any class conforming to NSCoding can be the top-level object. Thus you are not limited to user-interface classes for use with XIB files.
Storyboards
Some say XIB + Flows = Storyboards. Indeed Storyboard documents combines multiple XIB screens and connect those screens together with segues. For example if tapping on a button in one screen results in another screen being shown, you can model that by connecting the button on to a view controller that makes up the second screen by means of a segue.
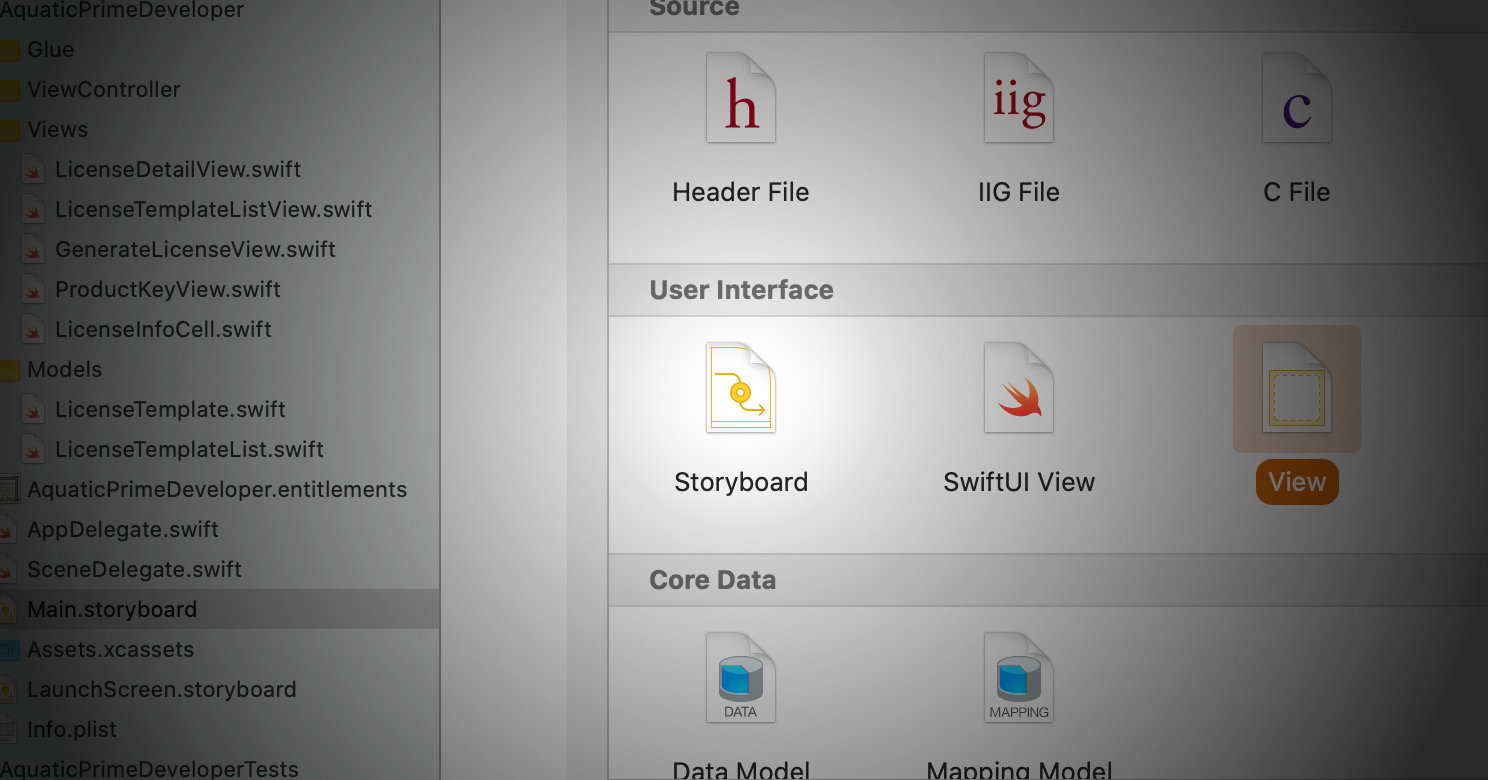
Thanks to segues being present and visible in the Storyboard designer GUI, they make it easy to self-document user interface flows. Simply open the Storyboard document, zoom out, and you get a bird’s eye view of how screens flow from one view controller to the next. One way to quickly get an overview of an app’s information architecture is to find the main Storyboard and just zoom out.
Another important feature of Storyboards apart from designing screen flows is to use it as the app’s launch image. This is the screen shown between the time the user starts your app until it is fully running. In turn, the launch storyboard should provide a “bare-bones” view of the app’s default state when no data is shown. Having a launch image gives an illusion that the app launched instantaneously and removes the awkward “black screen” that may otherwise be shown if the app does not have a launch image. Originally this launch image is was set of PNG files, one for each iOS device variant. However this method is now deprecated. The current recommendation is to use a storyboard for the launch image due to the many screen dimensions supported by iOS and iPadOS.
Note that launch storyboards has many limitations apart from a regular storyboard. Therefore don’t use any of your “normal” storyboards as a launch storyboard. Create one exclusively instead and keep it in sync with your app’s “blank state” UI during development.
One example limitation for launch storyboards is the lack custom classes. All classes referenced in a launch storyboard must come from the system. Since your app isn’t yet started, logically classes defined on your app is not yet available. Similarly having this restriction also allows iOS to pre-cache launch images (i.e. render the launch storyboard into an image file) when your app is first installed (or even while it is installed).
Springs and Struts
This is the original method to layout iOS views. It has been used many years prior on the mac.

The paradigm designates an extent to be either a spring or a strut. Springs resizes proportionally whenever the parent view is resized. Whereas struts would keep their respective lengths. In this context, an extent can be any one of these:
- subview width
- subview height
- any of the subview’s four margins
The view’s autoresizingMask property configures each of its six extents as a spring or strut. This property is a bit-field – turning it on or saying it to be flexible would configure the extent as a spring. Otherwise it would be a strut.
Springs and Struts paradigm for laying out views is largely historic for new code. It has been fully superseded by auto layout. In fact, UIKit would internally translate the value of autoresizingMask into auto layout constraints for views that still uses it. However you may encounter them if you have sufficiently old code base. Either un-migrated view code or code still needing to support iOS 5.x and earlier.
Auto Layout
Introduced in iOS 6.0, Auto Layout is currently the preferred mechanism for placements of native UIKit widgets. The foundations of Auto Layout was laid out (pun intended) in the 1998 paper The Cassowary Linear Arithmetic Constraint Solving Algorithm: Interface and Implementation by Greg J. Badros and Alan Borning.
In Auto Layout, you specify the dimensions of views declaratively by creating constraints of how an attribute of a subview relates to another attribute belonging to its sibling or the parent view. These constraints are really linear equations that, when solved, yields the positions and dimensions of those subviews.
That said, the system of linear equations would need to be solved for the entire view hierarchy, which roots at a UIWindow. Hence at times auto layout can fail should the system of equations does not have a solution. At this point, the auto layout system would “break” a few layout constraints (i.e. ignoring one or more equations) so that there may be a solution to the system of equations. When this happens, you’ll start seeing auto layout error messages in the console log.
There are two primary ways of specifying a view layout. One is to create an NSLayoutConstraint object expressing a single linear equation constraint. Create a bunch of these and then add it to the parent view. Another way is to use the Visual Format Language – a string-based domain-specific language in which a single statement would emit a number of layout constraints that you would need to add to the parent view.
Auto Layout can be complex. Fortunately UIStackView was introduced in iOS 9, so that you seldom need to specify layout constraints yourself. As long as your layout can be expressed in horizontal or vertical stacks (or a combination thereof), these container views would take care of the relevant Auto Layout constraints for you.
UIKit Dynamics
When Auto Layout and springs and struts are meant for static layouts, UIKit dynamics is designed for dynamic layouts as per its name. The framework is a 2D physics engine that can create a feel of realism in your app’s screens.
UIKit Dynamics works through attachments, forces, and collisions to create constraints analogous to Auto Layout. However these constraints are designed to move things instead of keeping them stationary. Hence these dynamic constraints creates a level of physicality to your UI. Views can appear to have mass, momentum, and inertia. Like how credit cards bounce around in iOS’ built-in wallet app.
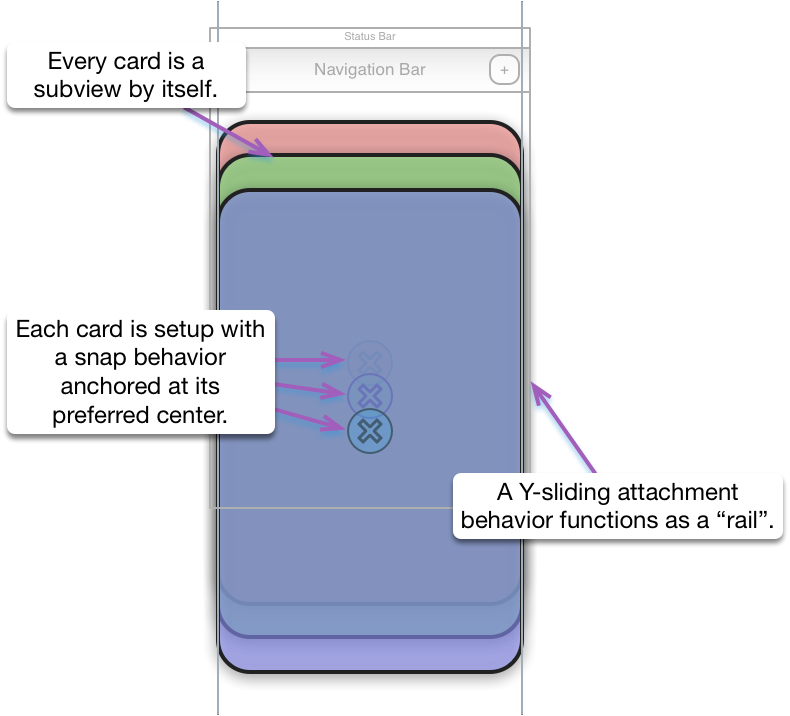
When using UIKit Dynamics with Auto Layout, remember to take care so that the two doesn’t interfere with each other. Generally Auto Layout should only handle the dimensions of subviews whereas UIKit Dynamics handles where they are placed within a subview. Of course this only applies in views employing both layout mechanisms.
Manual Layout
Despite all that, you can programmatically place views by having custom code that calculates their positions and dimensions. Simply override layoutSubviews with an implementation that sets the values of the frame property of all of its subviews.
In your layout code, you could also make use of the subviews’ size heuristics such as intrinsicContentSize or systemLayoutSizeFitting. Although these are meant for Auto Layout, you can also use the values returned by those methods as advisories for manual layout. Furthermore any custom view would need to implement them anyway – since views can’t assume whether the parent view would use auto layout or something else.
Manual layout would probably the most powerful yet the most challenging way to layout subviews. However this is often required when you are creating a custom control. Like for example a slider control with two knobs.
SwiftUI
Declarative UI seems to be fashionable this year and SwiftUI is Apple’s answer for it. Declarative means that the programmer only needs to specify what are there and not how things are constructed. Much like auto layout which places subviews through declarative constraints instead of manual layout that reads subviews’ desired dimensions and setting their respective frames one by one through some custom logic.
Another much-welcomed feature of SwiftUI is bindings. This is a two-way street in which data are instantaneously transferred between UI widgets and their corresponding data model objects. For example, when the user makes a change to a text field, the new string gets immediately mirrored into the application’s data model. Similarly if the application logic changes the data model, the text field would get the change and show it to the user. The code that manages this back-and-forth communication is part of the framework and thus code that you don’t need to write. Bindings has long been available through Interface Builder for macOS apps. Now thanks to SwiftUI, a similar functionality is also available on the rest of Apple’s platforms.
SwiftUI seems to be intended as a replacement of UIKit, namely UIView and its subclasses. Many of SwiftUI’s components are parallel to UIKit and has similar functionalities. However SwiftUI’s hasn’t yet reach feature parity to the entire UIKit and thus would likely be used in conjunction to UIKit in the foreseeable future.
When to use What
These tools have their respective strengths and weaknesses. Hence it is important to know what situation call for which tool or technique that would best solve the challenge.
Storyboards are great for putting together UI flow. That is, a group of view controllers which span a logical sequence within an app. A “signup” flow would be a good candidate for a storyboard file. Likewise “view shopping cart then checkout” is often categorized as a single flow. Remember that a “zoomed out” storyboard provides a self-documenting visual artifact of how its view controllers are linked to one another.
XIB files are mostly superseded by storyboards. One notable exception is for layout of table view cells (likewise collection view cells). Another good use for XIBs is when you need to re-use a certain view’s layout in multiple storyboards.
Whenever you have many types of table view cells in a single table, you’d probably want to put each of those cells’ layout into its own XIB file instead of inside the storyboard. Otherwise those prototype cells may easily fill up its view controller’s design-view.
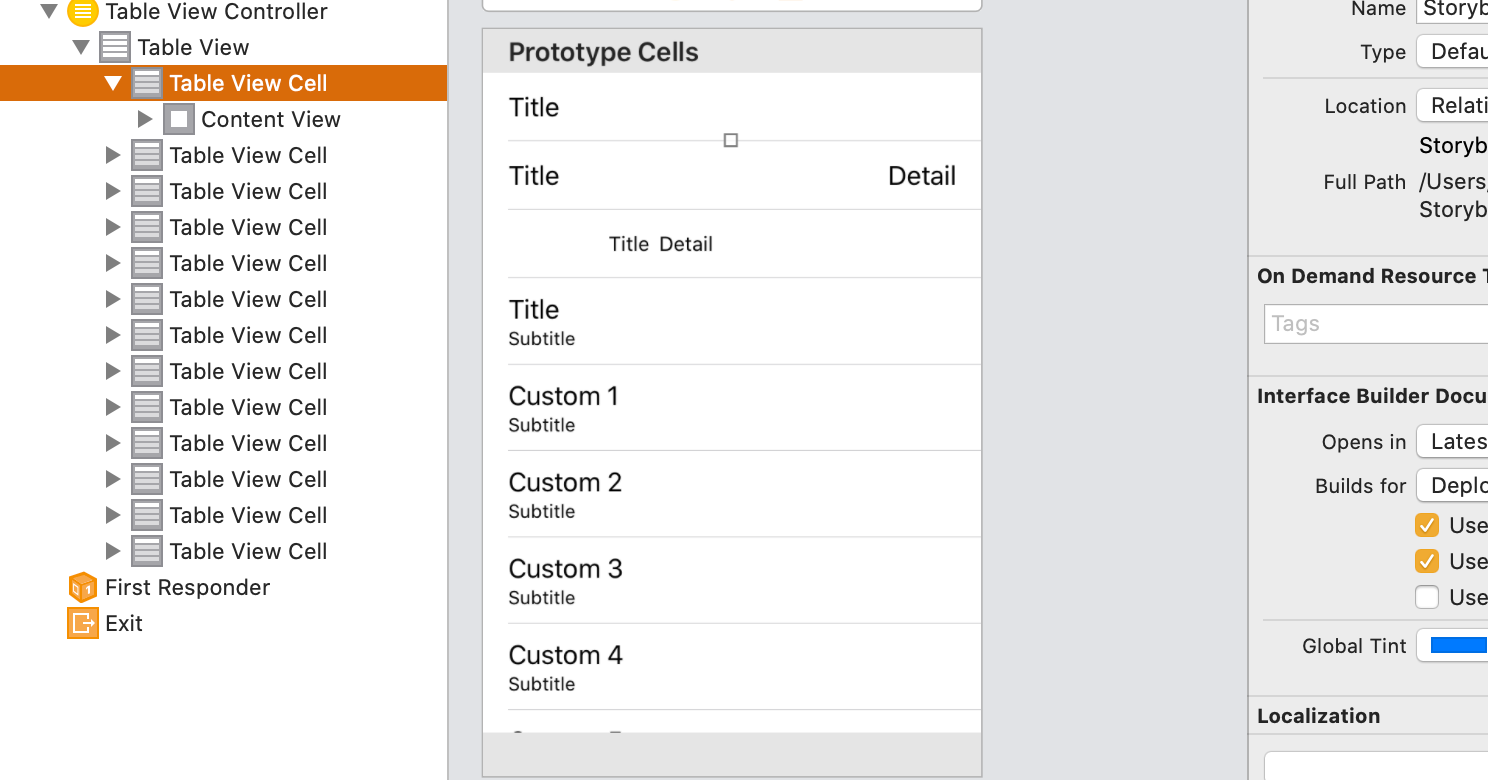
However when you are in a large iOS development team, code-based approaches are almost always better than storyboards and XIB files. This is for the sake of collaboration and change management alone. How large? That depends. But should the need often arises for more than one person modifying a single storyboard or XIB file during a sprint, that’s the time when you know the limit has been hit.
Both XIB and storyboards are hard to maintain in source control systems (such as git). When two people modify the same XIB or Storyboard document, it often result in change conflicts in the source control system. That is, the system couldn’t figure out which change that will ultimately win and would be the base for subsequent modifications. These conflicts would need to be resolved manually by a person by looking at the conflicting file to pick and choose which lines of the file are to be selected from which change. It’s hard enough to merge normal source code for this. It’s even harder for XIB files since these are XML which is not line-oriented, computer-generated, and quite challenging to merge textually. Worse, storyboard documents are XML bundles (collection of XML files), which makes it even harder to merge textually (and resulting in something that’s workable). Moreover I haven’t seen any good tools that can merge XIB files and Storyboards visually to make this task easier.
Because of the problem with source control conflicts, productivity gains of storyboards and XIBs are probably only beneficial for teams of three or less. As the team size grows, merge conflicts coming from these graphical documents would likely negate the productivity gained from using graphical tools in the first place.
Auto Layout should be your default for new components. Either code-based NSLayoutConstraint or configured through a storyboard or XIB. There isn’t much real reason to do springs and struts layout any more – apart from supporting legacy code or iOS 5.x and earlier.
However when your layout cannot be expressed through Auto Layout constraints, then manual layout is still a viable option. These constraints only works on the parent-child or sibling levels. If your layout depends on grandchildren depending on each other’s attributes, then manual layout would probably be necessary.
When you need views to have animations that tracks user interaction – a dragging behavior, for example – consider applying UIKit Dynamics. The rubber-banding behavior of scroll views that has been a hallmark of iOS user interface is a good example of such dynamism. Nowadays iOS extend that rubber-banding behavior to many parts of the system interface as well.
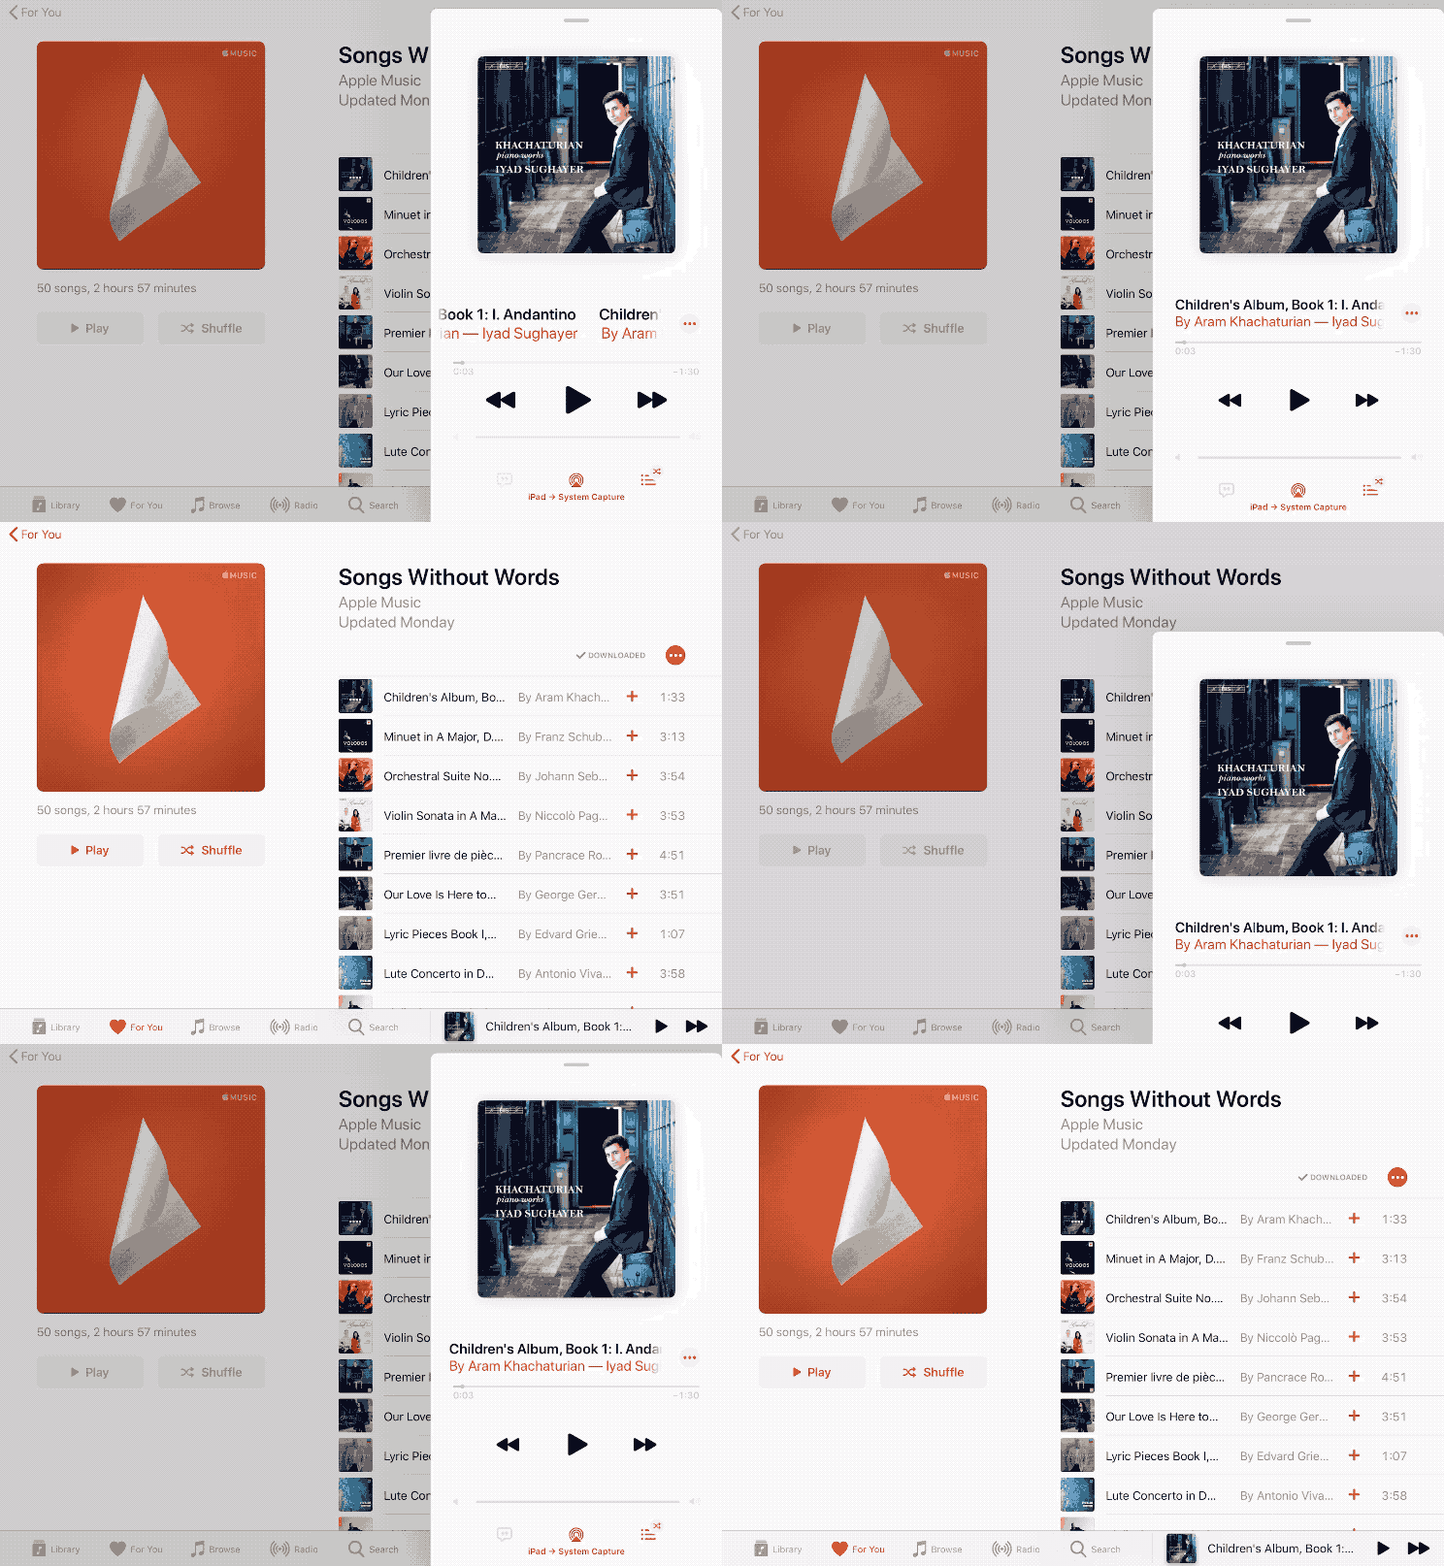
Similarly bouncing type animations would likely be a good candidate for UIKit Dynamics. Like how the App Store app of iPadOS 13 zooms and bounces when you select a featured item. This kind of animation would call for a physics simulation – either you simulate the physics yourself and use Core Animation to tween the values or use UIKit’s built-in 2D physics library, which is UIKit Dynamics.
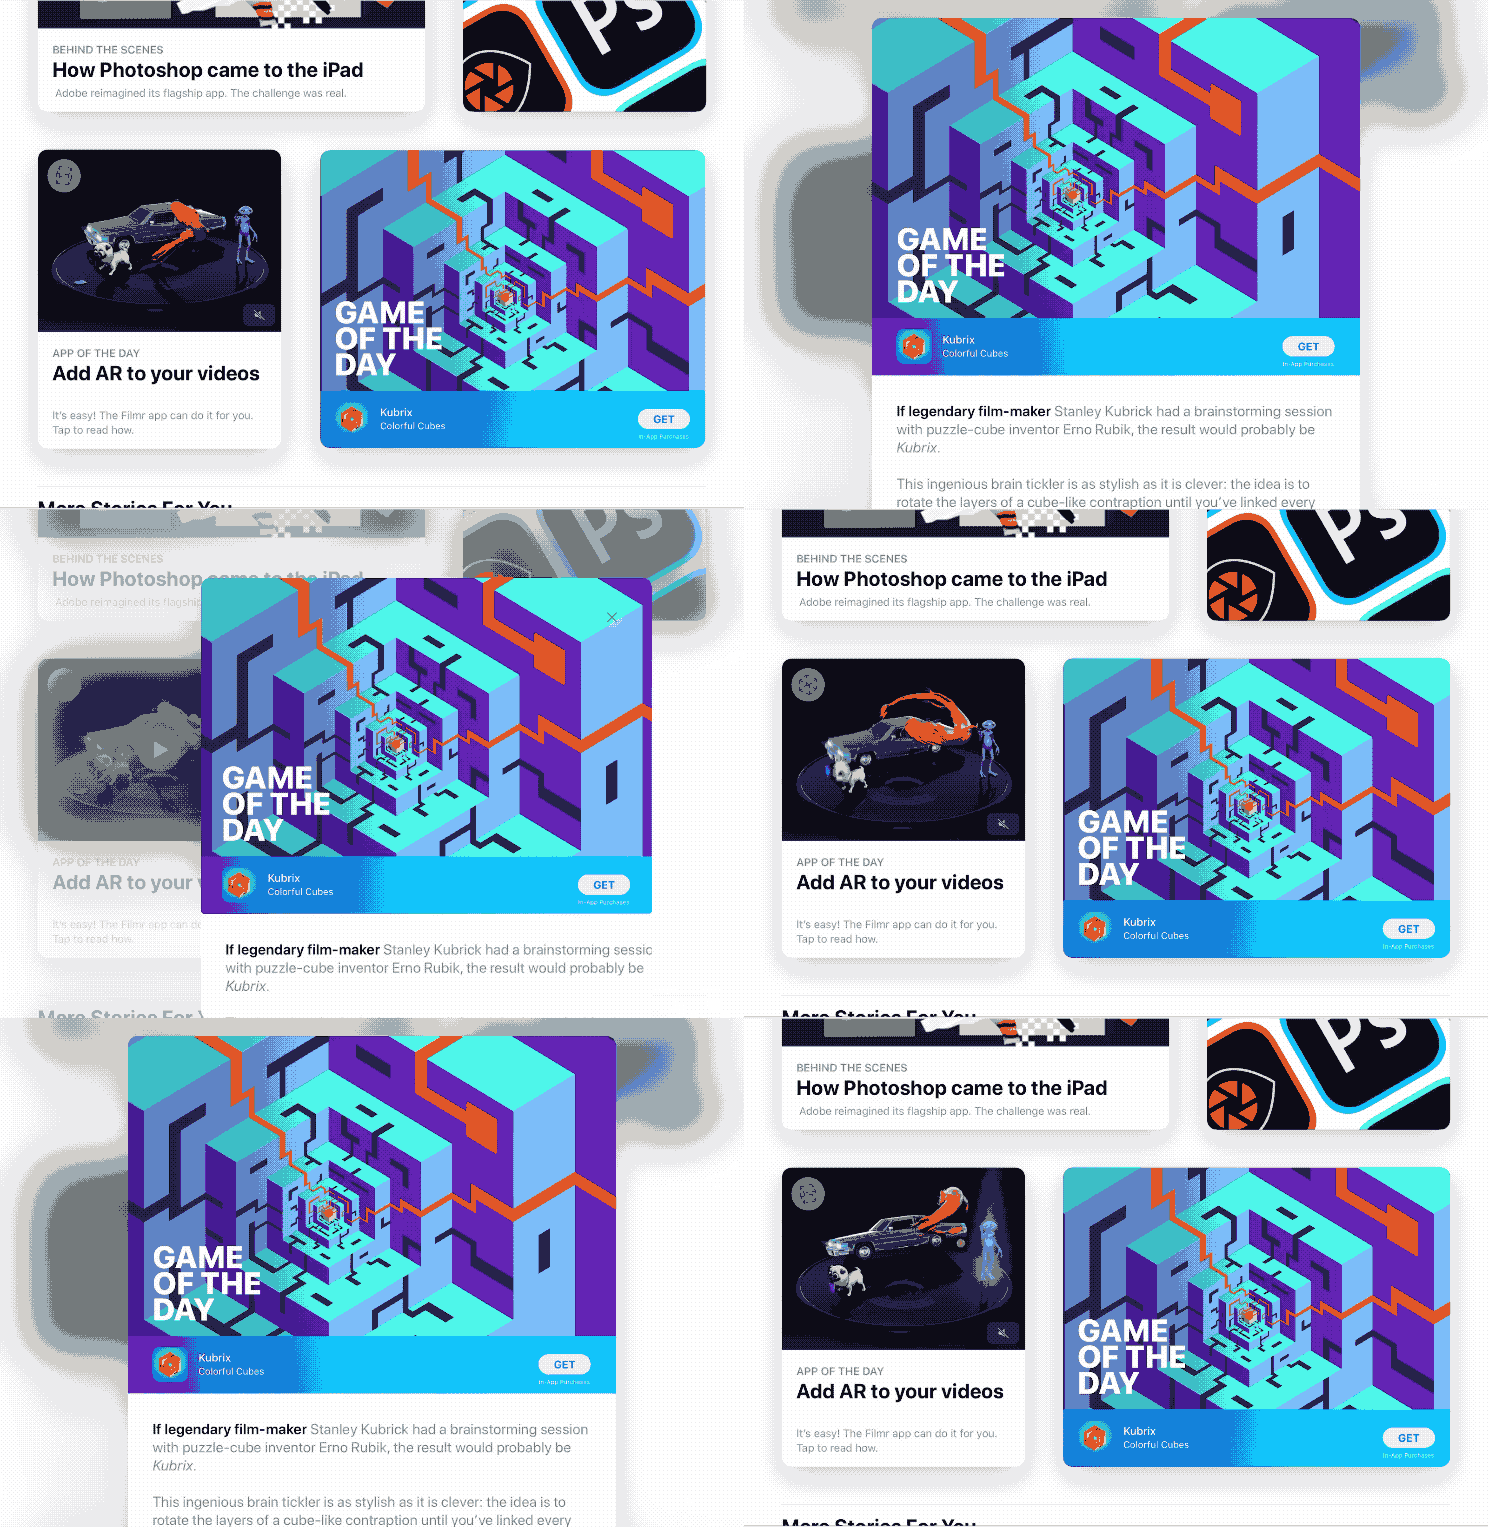
By the way, I’ve created a rough clone of the wallet app that you can refer for an example of how to implement UIKit dynamics. It was written in an old version of Swift, but probably still useful as a reference.
Forms and other data entry screens would probably be a case where SwiftUI would be most beneficial, as of Xcode 11. Its bindings feature would save a lot of work in moving data between UI elements and model objects. Of course you would need to be targeting iOS 13 (or macOS Catalina, etc) and already using Swift 5 as the project’s “main” language (however you define main).
I wouldn’t recommend using SwiftUI for any macro-architecture due to its current limitations. Since you’re likely going to need to drop back to UIKit for many cases, you wouldn’t want to paint yourself into a proverbial corner by going “all in” to SwiftUI. Its probably best to identify specific areas that SwiftUI can be most useful but not use it so much that completely lock yourself out of UIKit.
The default strategy is that scenes and top-level containers would need to be plain UIKit. That is, the UISceneDelegate would create and configure a UISplitViewController, UITabBarController, or other UIKit “top level” view controllers. In turn, specific second-level view controllers can be SwiftUI via UIHostingController`.
One architectural issue that I encountered with SwiftUI was its incomplete implementation of split views. SwiftUI’s dual-column navigation does not have the equivalent of UISplitViewController’s displayModeBarButtonItem. This caused a problem when a master/detail app is run on an iPad. The lack of such button causes the master view to be inaccessible in portrait mode, since the iPad’s behavior of such split view is to collapse the master and show it as a popup triggered by the left navigation button of the detail view controller.
See for yourself. The following screen capture comes from the template Master-Detail app using the Storyboard.
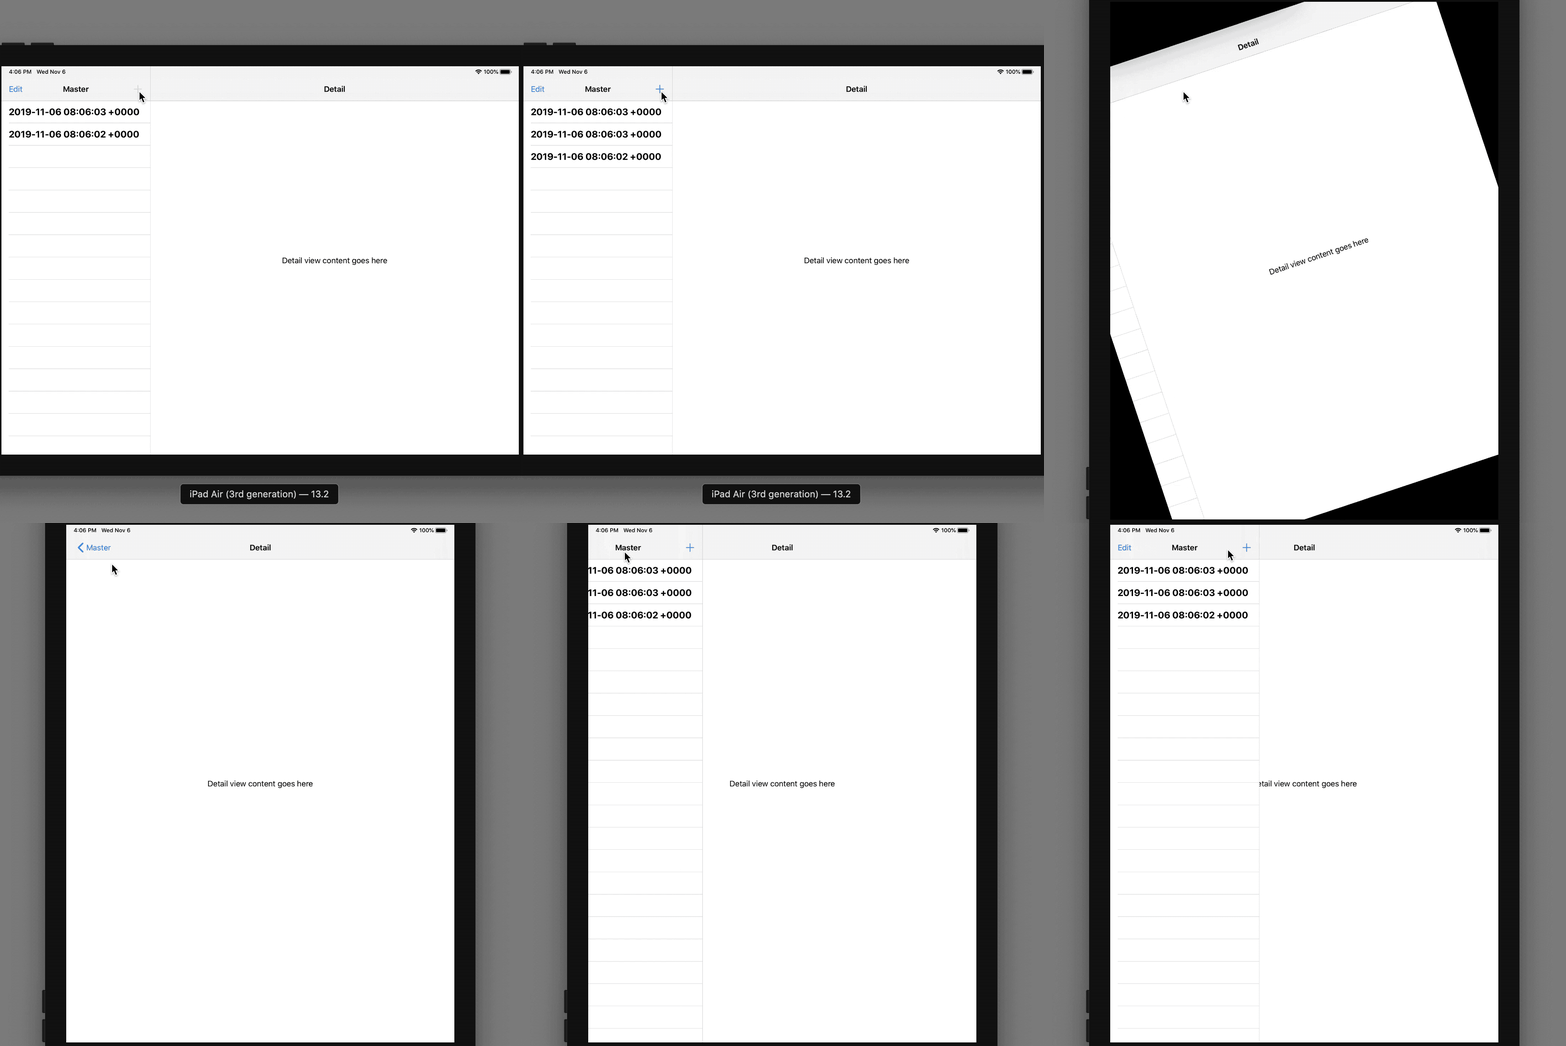
Whereas this next one came from the SwiftUI template. Notice there’s no way to get the Master view when the iPad is in portrait mode.
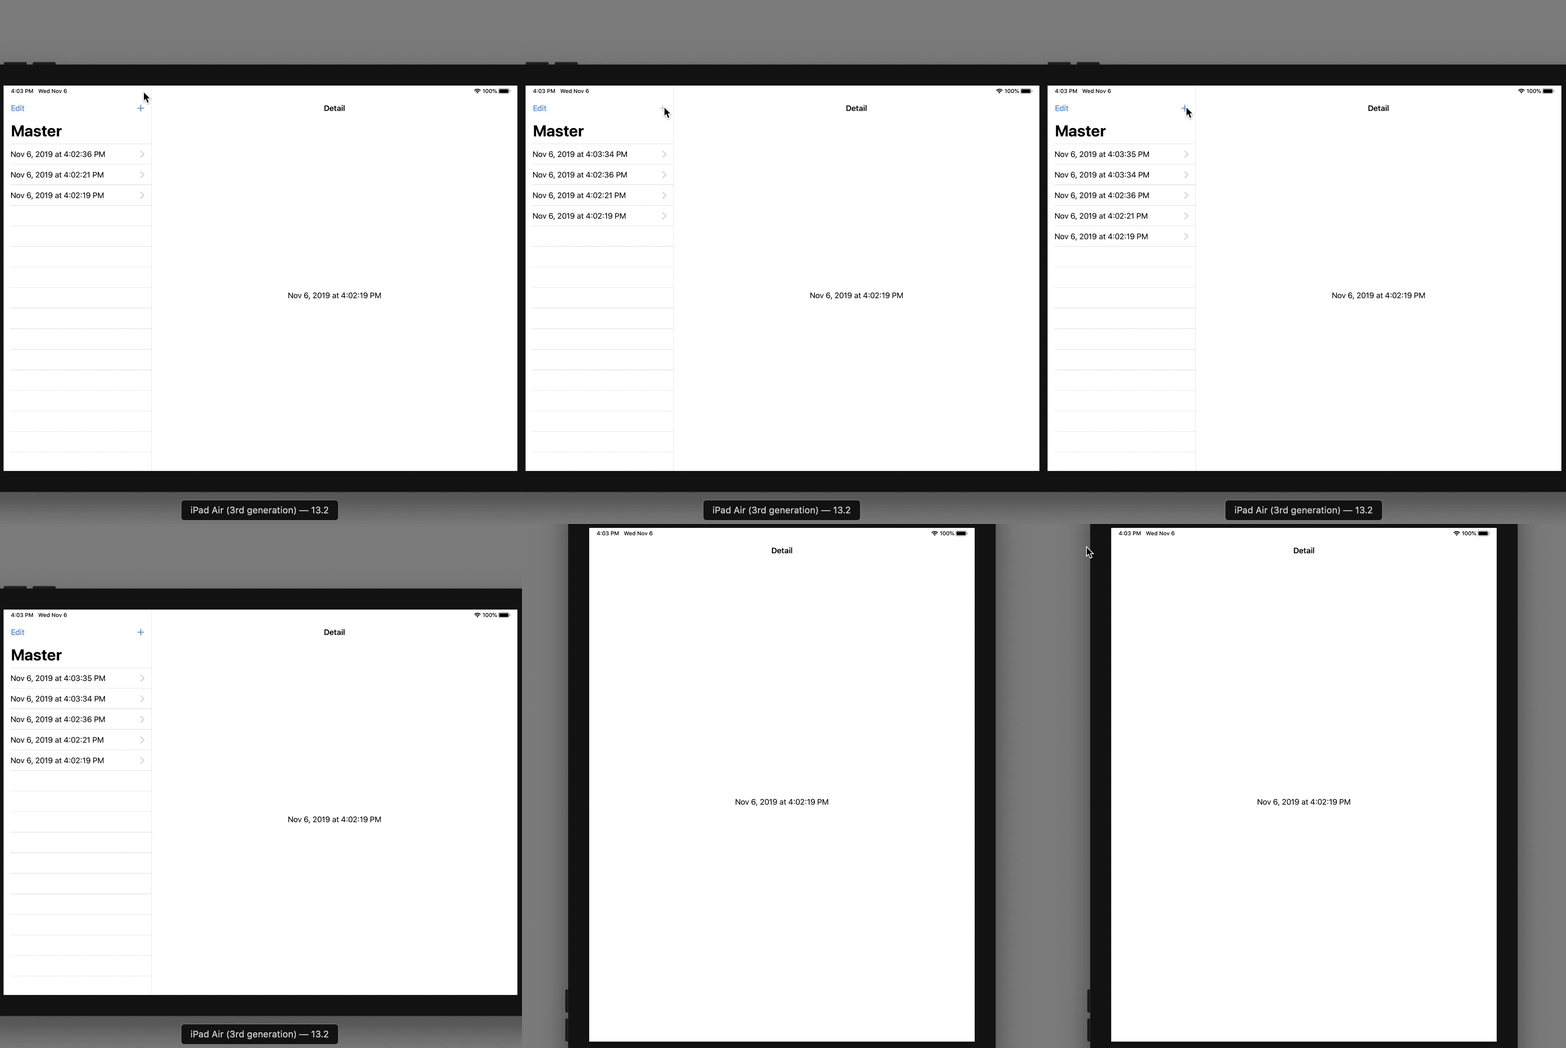
(You can try this out yourself. Open Xcode 11.2 and then create a Master-Detail App using the provided template. Create two projects, one using the “Storyboard” user interface and then the other with the “SwiftUI” user interface. Run the two apps on the iPad simulator in portrait and landscape modes. See if you can access the master list view when the iPad simulator is in portrait mode.)
Another issue with SwiftUI is the lack of support for a custom middle navigation item. SwiftUI only has a leading or trailing navigation bar item. This makes it impossible to have a “top tab” interface with a segmented control placed in the middle of the navigation bar like the one shown below.
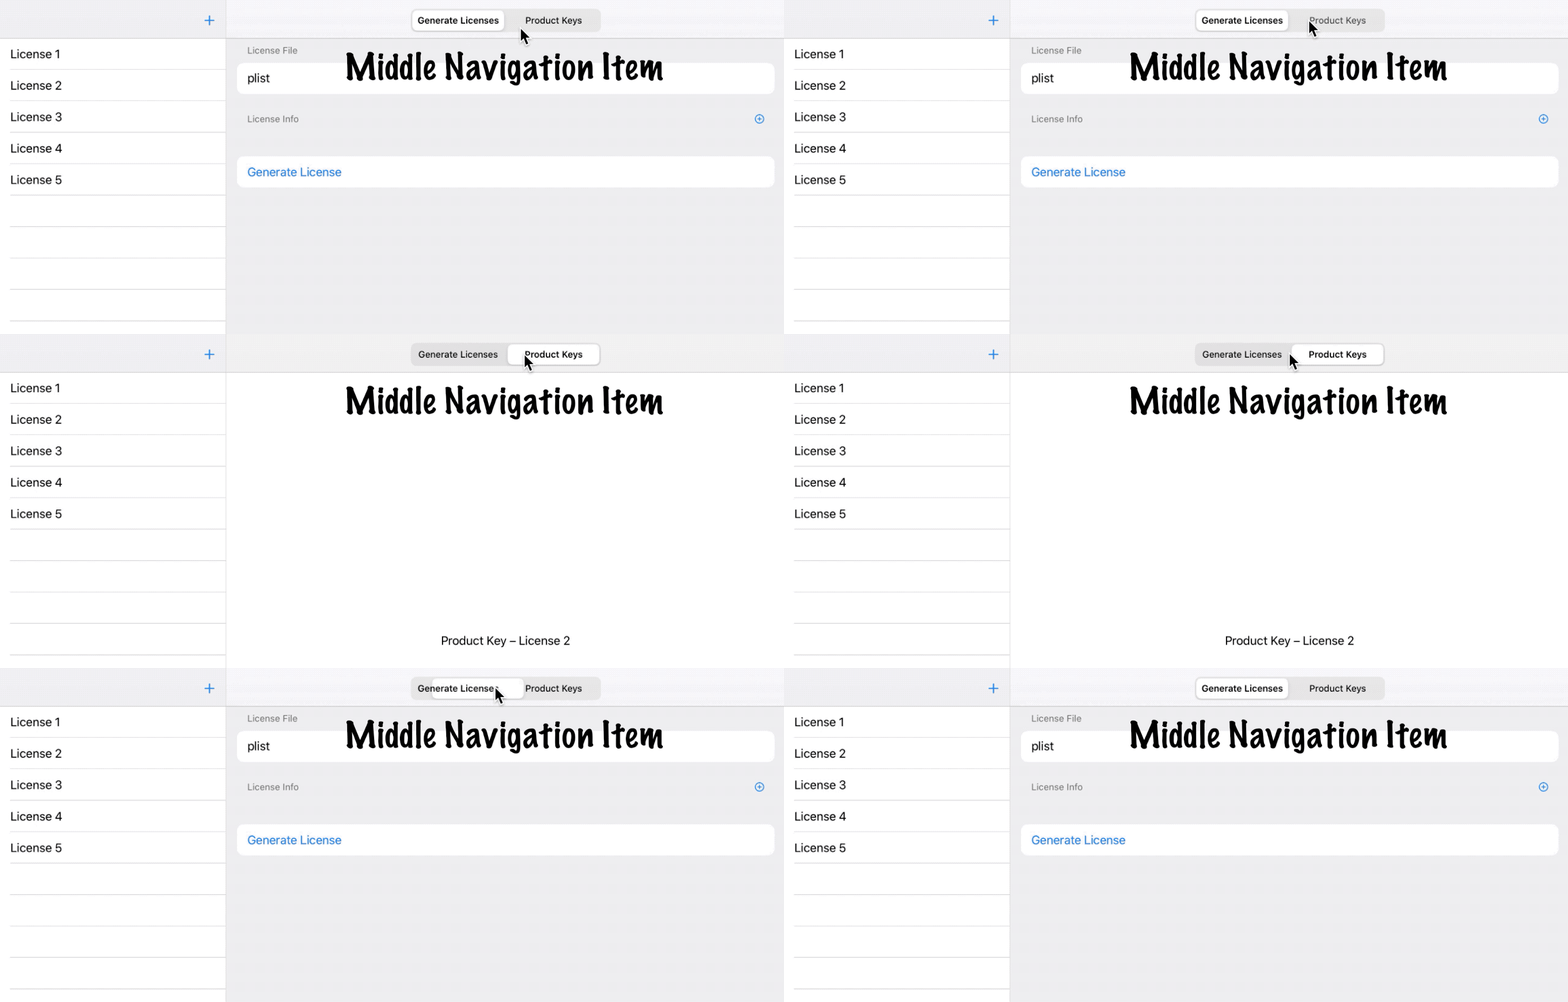
I got around those SwiftUI limitations by using plain UIKit components as the top-level container. Since those are the ones that I personally encountered in while working on SwiftUI within two months of its public release, they’re likely just the tip of the iceberg. That’s why you’ll need to architect the app such that UIKit elements would enclose SwiftUI in most cases, and not the other way around.
You could also use SwiftUI only on design-time as a preview engine. That is, populate Xcode’s Canvas with SwiftUI’s preview which in turn contain your normal UIKit view. This allows you to have multiple permutations of mock data which shows your UI in its various state, which is a lot harder to achieve in Interface Builder via @IBDesignable. You can even preview Objective-C views this way by wrapping them in SwiftUI.
To do this, first wrap your UIView subclass in a struct implementing UIViewRepresentable. Then create a PreviewProvider which returns a view structure containing an instance (or more) of this wrapper. Finally you can enclose all of this preview code using #if DEBUG conditional compilation and thus the code would not get built into the release version of your app, allowing your deployment target to be earlier than iOS 13.
Charting your Learning Path
When you are studying to get a job as an iOS developer, you would need to be proficient in all of the UI frameworks mentioned above. Getting a job (as opposed to doing your own thing) means that you’ll likely inherit a pre-existing code base which may use any of those frameworks and perhaps many more (3rd party frameworks).
But SwiftUI is moderately exempted until Xcode 13 is out. This is due to its immaturity at this time of writing (now is Xcode 11 era).
Nevertheless, do keep an eye on SwiftUI and use it in small portions of your app if you can. If you have some time to try it out, definitely do so. SwiftUI also makes an excellent UI framework for use in Playgrounds due to its brevity and data binding capability.
When starting out in your studies and work on your exercise apps, start with storyboards and use it to create auto layout constraints. Learn how to set up layout constraints from the storyboard designer. Also learn how to use and configure stack views effectively.
Then learn Auto Layout’s Visual Format Language. Use it to configure static layouts programmatically.
Having used Auto Layout in storyboards and programmatically, by then you should have a grasp of how it works. Go further by learning how to change layout constraints programmatically at runtime. This would likely involve creating individual layout constraint dynamically and change its constant property (isn’t it ironic that the only change is constant 😉). Maybe add or remove constraints programmatically at runtime when the view is live and on-screen. Enclose the change in animation blocks and visualize the transition.
When you are comfortable in programmatic auto layout, it’s time to take a step further and move up to dynamic layouts. Learn about UIKit Dynamics – how to set up the constraints of this physics engine and how to make it “play nice” with Auto Layout. Take a screen recording of some of the built-in apps’ physics animation and see if you could reverse engineer some of its interactions. The dynamism in the App Store app or the Wallet app would probably make good learning examples. You can plug in your iOS device to your Mac via a Lightning to USB cable and use Quicktime to record your iOS’ device’s screen.
On top of that, start dabbling on SwiftUI. Use it when you can, likely in implementations of self-contained view controllers. Use it for components with a smaller, well-defined scope. SwiftUI would shine on data-entry type user interfaces – those forms with lots of fields, knobs, and options.
Remember that you can use view controller containment to embed a SwiftUI view into a UIKit view hierarchy. That is, enclose the SwiftUI view inside UIHostingController and embed that in a UIViewController subclass.
The other way around is also possible. Create a struct conforming to UIViewRepresentable. In it, implement callback methods which creates a UIView subclass or update instances that it created.
What’s Next
Create your learning schedule. From the outline above, commit to a schedule and write down your learning targets and the dates of each. It’ll be good to interleave “reading time” with “practice time” when doing your studies.
Most of all, enjoy your learning experience!

0 thoughts on “How Newbies Should Start Learning iOS User Interface Programming”